
— Paint the base color. (After your base coat, of course!)
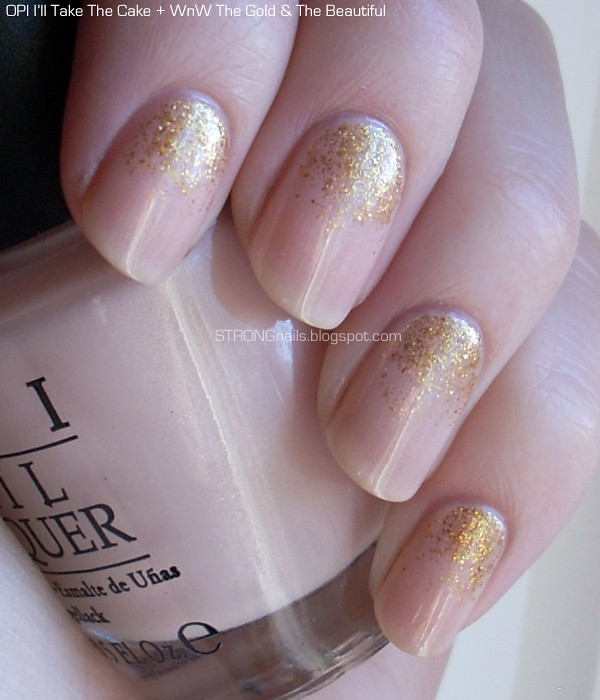
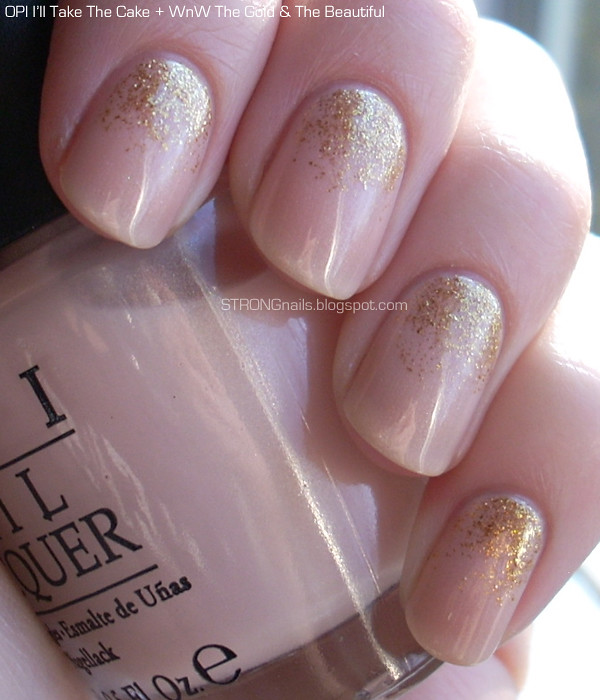
Use any color you like. I painted my nails with four coats of OPI I'll Take The Cake. It's a sheer pink with very fine multicolor shimmer. Four coats seems like a lot, but this polish goes on so smoothly it was no trouble.
— Let it dry.
It doesn't need to be completely dry, just let it dry for a few minutes. You want the base color to stay in place without wrinkling when you add the glitter.
— Add the glitter.
Use any color glitter polish you like. I used Wet n Wild The Gold & The Beautiful. It's glitter in a clear base, which made it perfect for this technique.
- dab a small to medium drop of glitter at the base of the nail.
- wipe the rest of the polish off the brush and back into the bottle.
- lightly drag the drop of glitter outward in small, short strokes.
- fade the glitter by making short strokes starting partway up your nail. This will drag some glitter particles to the middle of your nail, but will not catch too many by taking glitter from the densest part at the base of the nail.
— Finish the manicure.
All you need now is a quick drying topcoat and some cuticle oil!
Here's what I'll Take The Cake looks like on its own, for good measure:


I hope my instructions made sense. Tell me if anything needs clarifying! What color combinations would you try? I want to try taupe with silver glitter, but I have to buy some silver glitter polish first!
I love the nude w/ glitter look.Thanks for the tutorial!
ReplyDeleteThanks for the tutorial! Love this look!
ReplyDeletethis looks so nice on you ! & the gradient looks too perfect! i love it!
ReplyDeleteOh, this is a perfect combination - and it would work so well with so many variations! Thank you for the tutorial. I actually do mine this way, but not as neatly as yours looks!
ReplyDeleteVery pretty!
ReplyDeleteHi there! I love this look so much that I blogged about it on my blog. I just noticed your copyright notice *after* posting, but per your Attribution-NonCommercial-NoDerivs license, I've given you full attribution and am not infringing on either of the other terms. Either way, if you would like me to remove the post I definitely will, you can find it here:
ReplyDeletehttp://lookshop.tumblr.com/post/13177709816/a-beautiful-nail-idea-from-strongnails
I love your blog; keep up the amazing work!
Hi Danielle! No need to take down the post, I'm so flattered by it! Thank you. =)
ReplyDeleteThis is so gorgeous - I've looked at it about 10 times! Really well executed and the colors look great together!
ReplyDeleteI love this!! I've just recently found the world of nail blogs, adding you to my reader. Loved doing my nails since jr. high, mostly classic french manis, but now I've got tons of creative ideas and am branching out.
ReplyDeleteSo cute
ReplyDeleteHi, I find reading this article a joy. It is extremely helpful and interesting and very much looking forward to reading more of your work.. sns nails
ReplyDelete