(UPDATE: Here's my review of the entire collection, with all the swatches together.)
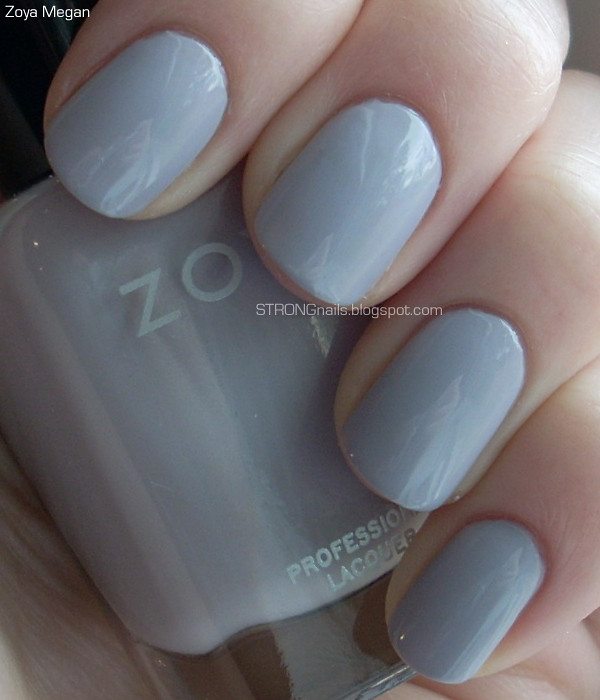
Hey there! Continuing with the Feel Collection, here's Zoya Megan. I'm finding this color tough to describe. It's very delicate, light gray with a hint of lavender. (I guess I just described it!)
Like the other polishes in this collection, Megan needs two coats for opacity. I recommend same technique of one thin coat and a second thicker coat for applying this color. Even though these pastels can be a little annoying and thick, I'm becoming more and more impressed with this collection because despite any application issues, you really can get this polish right in two coats. If you have any leftover lumpiness, the topcoat will smooth everything out.
Tuesday, November 22, 2011
Monday, November 21, 2011
Zoya Carey — Feel Collection Winter 2011
(UPDATE: Here's my review of the entire collection, with all the swatches together.)
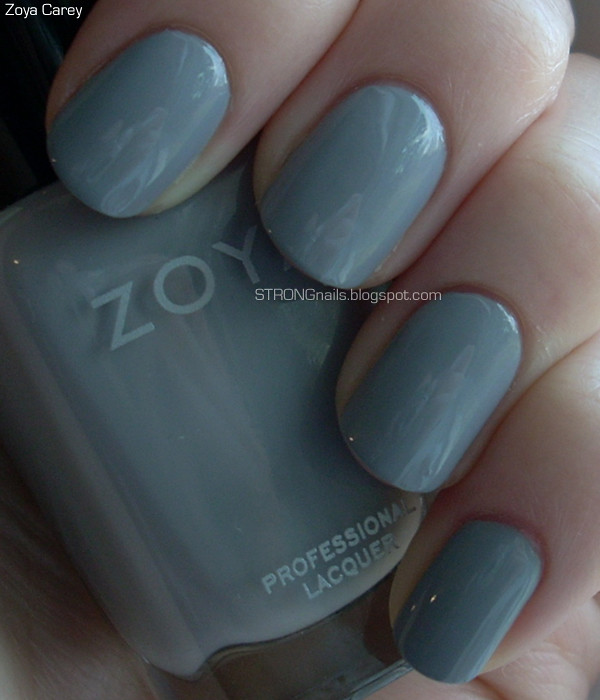
Here's the next color from the Zoya Feel Collection, a pale gray creme called Carey. This is a fairly neutral gray, although I would say it leans a tiny bit to the cool side.
Like Kristen, this polish only needs two coats for complete opacity. Since it's a pale color, the formula is a little tricky to work with. I found it was best to make the first coat thin, and to not worry about how streaky the coverage was. Wait at least two minutes, then make the second coat a little thicker. It also helps to apply the color in as few brush strokes as possible.
Sunday, November 20, 2011
Zoya Kristen — Feel Collection Winter 2011
(UPDATE: Here's my review of the entire collection, with all the swatches together.)
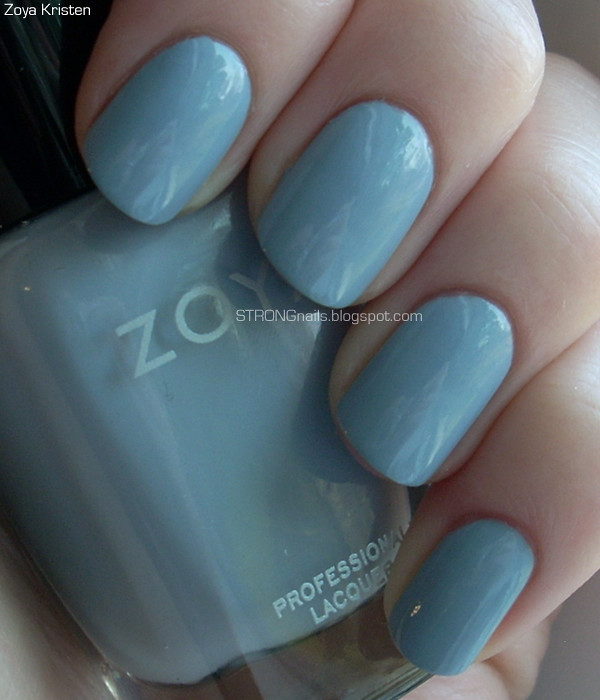
I got the Feel collection in the mail yesterday. I rarely buy full collections, but I was totally drawn into this one by the promo picture. I do not regret my purchase, each color is lovely! First I'll show you Zoya Kristen, which is a slightly blue-tinged pale gray creme.
The formula for this color, and this whole collection, is simultaneously impressive and frustrating. I'm super impressed that it only took two coats to get full coverage and opacity. This is pretty rare for such pale colors. The texture is chalky and tricky to work with, but still a major improvement over pastel colors that came out a couple years ago. Only two coats! I don't think I've ever encountered a pastel that worked in less than three coats before. So that's a big plus.
The first time I applied this color, I found it irritating and difficult to keep the surface smooth. I decided to try again a few hours later, and for whatever reason it seemed pretty easy that time. The first time I applied this color the brush seemed so small and skinny, and I couldn't for the life of me find the wider side of it. The second time the brush still seemed too small but I was able to make it fan out better. I think most of the application issues would be easily solved by Zoya adopting a nicer brush. If it just had a few more bristles, and was a tiny bit flatter, I think I would love the brand even more.
Saturday, November 19, 2011
OPI Ski Teal We Drop
Hello everyone! I'm sorry about the long absence. I went out of town and also came down with a cold, so I have been terribly neglectful of my blog. I got some good nail polish mail today, though! The Zoya Feel collection arrived, so I hope to be posting swatches and reviews of those color soon.
OPI Ski Teal We Drop came out with the Fall 2010 Swiss Collection. It's a lovely saturated teal creme. The second picture looks most color accurate on my monitor.
I only needed two coats for perfect, smooth opacity. The formula is pretty easy to work with, although it can sometimes feel a tiny bit thick. I have a dense wool sweater that's almost this exact color, so to me this shade fits right in with the whole snowy, Swiss, skiing concept.
Friday, November 11, 2011
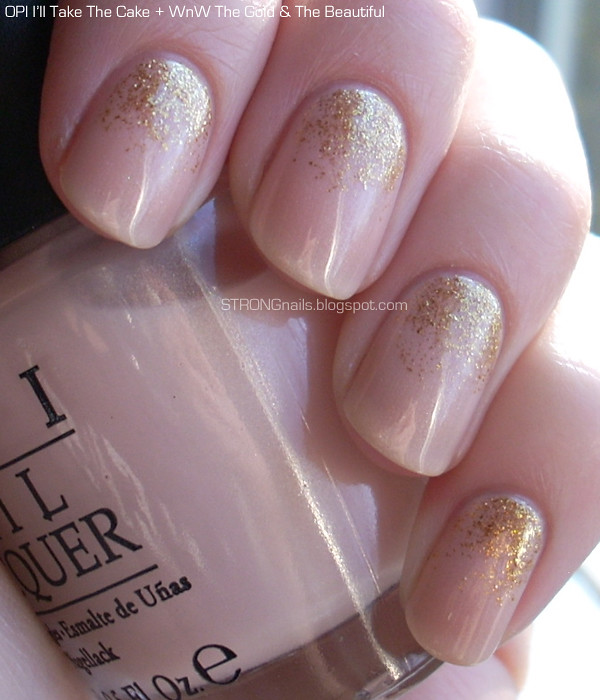
How To Do A Simple Glitter Gradient Manicure — No Sponges Necessary!
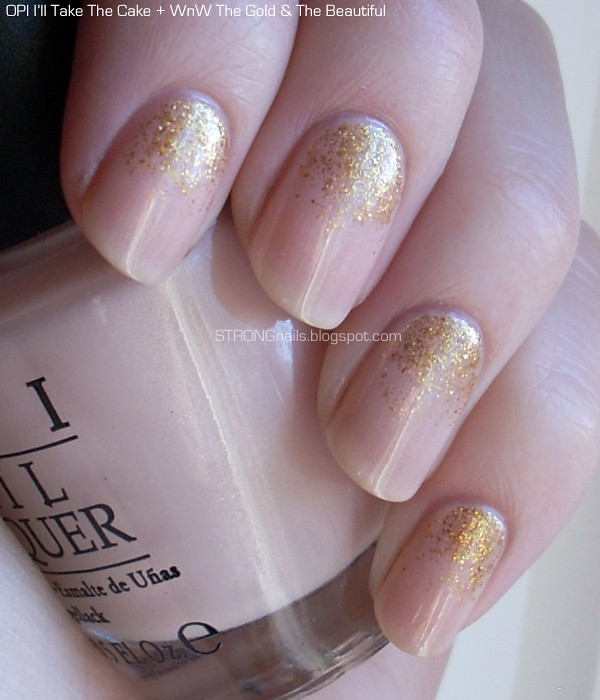
Lately I've really gotten into browsing Pinterest. It's a cool way to discover beautiful, interesting things. There are plenty of fellow nail fanatics on there, and I'm having fun finding them and following their pin boards. This manicure was inspired by all the glittery manicures people have been pinning up on Pinterest.
This is a manicure that looks fancy but is super easy to do:
— Paint the base color. (After your base coat, of course!)
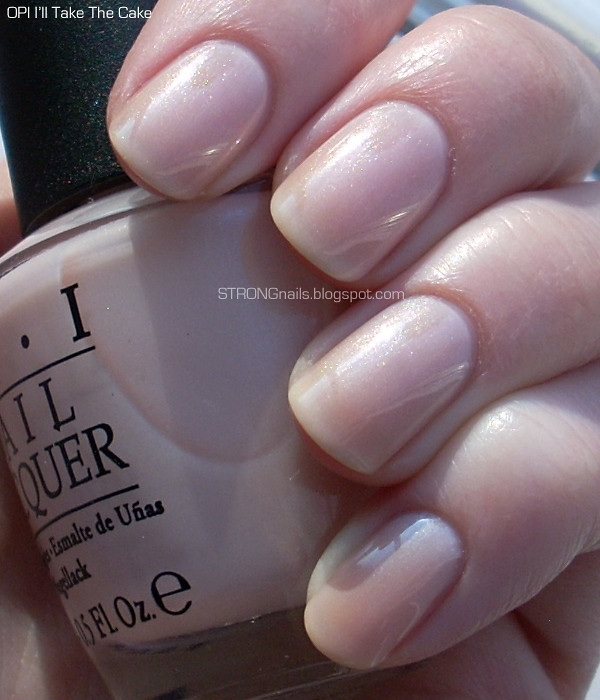
Use any color you like. I painted my nails with four coats of OPI I'll Take The Cake. It's a sheer pink with very fine multicolor shimmer. Four coats seems like a lot, but this polish goes on so smoothly it was no trouble.
— Let it dry.
It doesn't need to be completely dry, just let it dry for a few minutes. You want the base color to stay in place without wrinkling when you add the glitter.
— Add the glitter.
Use any color glitter polish you like. I used Wet n Wild The Gold & The Beautiful. It's glitter in a clear base, which made it perfect for this technique.
- dab a small to medium drop of glitter at the base of the nail.
- wipe the rest of the polish off the brush and back into the bottle.
- lightly drag the drop of glitter outward in small, short strokes.
- fade the glitter by making short strokes starting partway up your nail. This will drag some glitter particles to the middle of your nail, but will not catch too many by taking glitter from the densest part at the base of the nail.
— Finish the manicure.
All you need now is a quick drying topcoat and some cuticle oil!
I hope my instructions made sense. Tell me if anything needs clarifying! What color combinations would you try? I want to try taupe with silver glitter, but I have to buy some silver glitter polish first!
— Paint the base color. (After your base coat, of course!)
Use any color you like. I painted my nails with four coats of OPI I'll Take The Cake. It's a sheer pink with very fine multicolor shimmer. Four coats seems like a lot, but this polish goes on so smoothly it was no trouble.
— Let it dry.
It doesn't need to be completely dry, just let it dry for a few minutes. You want the base color to stay in place without wrinkling when you add the glitter.
— Add the glitter.
Use any color glitter polish you like. I used Wet n Wild The Gold & The Beautiful. It's glitter in a clear base, which made it perfect for this technique.
- dab a small to medium drop of glitter at the base of the nail.
- wipe the rest of the polish off the brush and back into the bottle.
- lightly drag the drop of glitter outward in small, short strokes.
- fade the glitter by making short strokes starting partway up your nail. This will drag some glitter particles to the middle of your nail, but will not catch too many by taking glitter from the densest part at the base of the nail.
— Finish the manicure.
All you need now is a quick drying topcoat and some cuticle oil!
Here's what I'll Take The Cake looks like on its own, for good measure:
I hope my instructions made sense. Tell me if anything needs clarifying! What color combinations would you try? I want to try taupe with silver glitter, but I have to buy some silver glitter polish first!
Subscribe to:
Posts (Atom)

